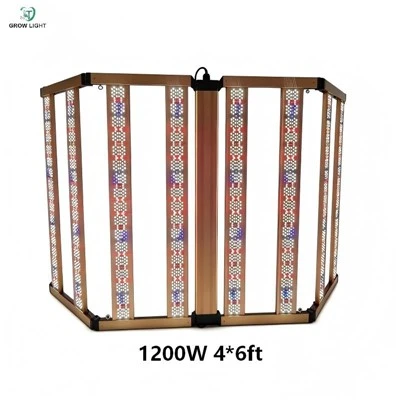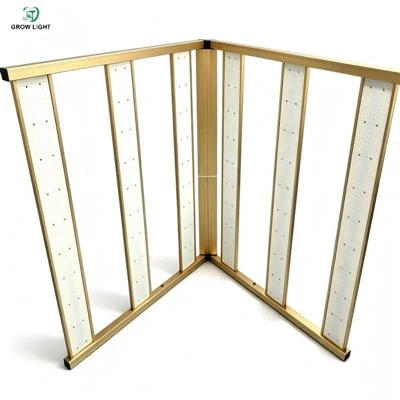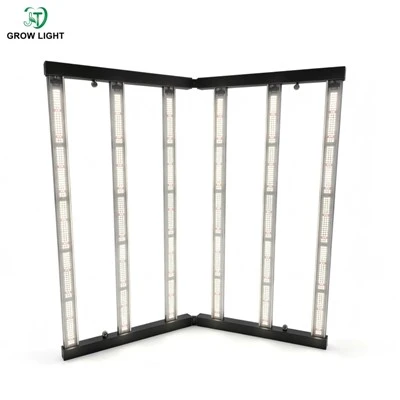
In tomato greenhouse supplemental lighting, a common planning split for combining top and under canopy grow lights is about 70–80% of the installed lighting power on top lights and 20–30% on under canopy lights. Top lights cover the upper canopy, where most of the light is absorbed. Under canopy lights cover the middle and lower leaves and the trusses hanging in the shade. For a standard layout, that works out to roughly 10–20 W/m² of under canopy power alongside 35–55 W/m² of top lightingThe split is a starting point, not a rule. Plant density, variety, natural light at your site, and the efficacy of the fixtures all move it. The sections below compare top lighting vs under canopy lighting, how to calculate the power, what a 2,000 sq ft house might look like, and what to check when you buy. Dual Side Emission Under Canopy Lighting For Commercial Grow Rooms and greenhouses is the product type this article focuses on, because it changes how many fixtures a row layout needs.
Why Tomato Greenhouses Need More Than Top Lighting
Greenhouse tomatoes are grown as tall, trained vines, often 4 m or more on a high wire by the end of the season. The upper leaves catch most of the light, and each layer below receives less of it. By mid-season the leaf layer is thick enough that the middle and lower part of the plant sits in deep shade, even with strong top lights.
Three problems follow from that:
Lower and middle leaves contribute little. Leaves that get too little light photosynthesize slowly and may be removed earlier, which shortens the working leaf area.
Trusses in the shade develop more slowly. Fruit hanging below the dense canopy gets less light, which can slow ripening and affect size and colour.
Dense, dim canopies stay damp. Humidity can build up around leaves that get little light and little air movement, which raises disease pressure.
Adding more top light raises the light at the top, but little of it reaches the layers below. Inter-canopy lighting for tomatoes, meaning light placed inside the canopy, is the more direct way to reach them.
What Top Lights Do and What Under Canopy Lights Do
Top lights hang above the crop. They deliver the bulk of the supplemental light to the upper canopy and set the base level of light for the whole plant. Under canopy lights, also called inter-canopy lights or interlighting, are slim bars hung between rows or along the stems, close to the leaves. They cover the layer that the top lights cannot reach.
A dual side emission bar gives out light from both faces. In plain terms, one bar hung between two rows lights the plants on its left and its right. A single side bar lights only one face, so the same two rows would need two bars. Bars at the end of a bay or next to a wall still tend to be single side, because there is nothing on the other side to light.
Top lights vs under canopy lights
|
Factor |
Top lights |
Under canopy lights |
|
Position |
Above the canopy |
Between rows or along the stems, inside the canopy |
|
Main target |
Upper leaves and overall light level |
Middle and lower leaves and lower trusses |
|
Share of installed power (planning range) |
About 70–80% |
About 20–30% |
|
Heat reaching the plant |
More radiant heat on the top leaves |
Low, because fixtures are close to the leaves and run cooler |
|
Adjustment during the season |
Raised as the plant grows, or fixed |
Moved up with the plant; spacing needs more attention |
|
Can it work alone? |
Yes, but lower leaves stay shaded |
No, it adds to top light or sunlight |
|
Typical emission |
Downward |
Single side or dual side |
How to Split the Power Between Top and Under Canopy Lights
Start with the total supplemental power your site needs. That depends on how much natural light you get, the light target for the crop, and the efficacy of your fixtures. Then divide it between the two positions.
Step 1. Take your greenhouse floor area (A) in m².
Step 2. Choose a total installed power density (P) in W/m².
Step 3. Choose the share for under canopy lights (S), for example 25%.
Step 4. Under canopy power = A × P × S. Top light power = A × P × (1 − S).
Example: a 200 m² house at 60 W/m² and 25% under canopy share.
Total: 200 × 60 = 12,000 W
Under canopy: 12,000 × 0.25 = 3,000 W
Top lights: 12,000 × 0.75 = 9,000 W
Table 2 shows how the split often changes with planting density. Denser, taller crops usually justify a bigger share for under canopy lighting, because more leaf area sits in shade. [Treat the figures as planning values and confirm with a PPFD map.]
Power split by planting density
|
Planting layout |
Typical density |
Total installed power |
Under canopy share |
Under canopy power (per m² of floor) |
|
Lower density |
about 2.2–2.5 stems/m² |
45–55 W/m² |
about 15–20% |
about 7–11 W/m² |
|
Standard commercial |
about 2.5–3.0 stems/m² |
50–65 W/m² |
about 20–25% |
about 10–16 W/m² |
|
Dense, high-wire |
3.0 stems/m² or more |
55–75 W/m² |
about 25–30% |
about 14–22 W/m² |
Two cautions. First, a larger under canopy share only helps if the bars are placed where the leaves are. A bar hung too high or too far from the plants wastes the light. Second, under canopy lights do not reduce the need for top lighting in a low-light region. They add to it.
Tomato Light Needs by Growth Stage
Tomatoes do not need the same light throughout the crop. Seedlings, flowering plants and fruiting plants have different needs, and the role of the under canopy fixture changes with them.
Light reference by growth stage
|
Stage |
Role of under canopy lights |
PPFD reference |
Photoperiod reference |
|
Propagation / seedlings |
Usually not used; top or propagation lights do the work |
[Insert range, µmol/m²/s] |
about 16–18 h incl. natural light |
|
Early vegetative growth after planting |
Not needed until the canopy closes |
[Insert range] |
about 16–18 h |
|
Flowering and fruit set |
Light the lower leaves and young trusses as the canopy thickens |
[Insert range] |
about 14–18 h |
|
Fruit swelling and harvest |
Main period for under canopy light: keep middle and lower leaves productive |
[Insert range] |
about 14–18 h |
Tomatoes can be damaged by very long, continuous light. Many growers keep a dark period each day and avoid running lights around the clock. [Confirm stage targets and photoperiod with your agronomist or seed supplier.]
Real-World ScenarioA 2,000 sq ft Tomato Greenhouse
This is an illustrative layout with stated assumptions, not a measured project
Assumptions
Floor area: 2,000 sq ft, about 186 m²
Total installed lighting power: about 60 W/m², so about 11,200 W
Under canopy share: 25%
Under canopy bars: dual side, 100 W each
Top lights: 400 W each
Run time: 10 hours per day on average in the supplemental season
Supplemental season: 150 days
Electricity price: $0.12 per kWh
Fixture count and power
Under canopy: 28 bars × 100 W = 2,800 W (about 15 W/m²)
Top lights: 21 fixtures × 400 W = 8,400 W (about 45 W/m²)
Total: 11,200 W, with 25% on the under canopy side
Layout idea. Hang the dual side bars in the aisles between pairs of rows, so each bar lights two rows. Space the bars along the aisle to keep light even, and offset them from the top lights so the two do not shade each other. [Confirm bar length, aisle count and spacing with your own row plan.]
Electricity estimate
Under canopy: 2.8 kW × 10 h = 28 kWh per day, about $3.36 per day
Top lights: 8.4 kW × 10 h = 84 kWh per day, about $10.08 per day
Total: 112 kWh per day, about $13.44 per day
Per 150-day season: 16,800 kWh in total, about $2,016, of which under canopy is 4,200 kWh and about $504
Actual use will be lower if sunlight lets you switch lights off or dim them on bright days, and higher if your tariff includes peak charges or your run time is longer. The result also does not include fixtures, installation or maintenance costs.
Key Specs to Check Before You Buy
Not all LED grow lights for greenhouse tomatoes perform alike: similar-looking fixtures can differ in efficiency, durability and light quality. These are the specs to compare.
Specs that affect performance and cost
|
Parameter |
Why it matters |
What to ask for |
|
Photon efficacy (µmol/J) |
Light output per unit of electricity; higher means less power for the same light |
System-level value with test conditions. [Insert your value] |
|
Spectrum |
Affects growth and fruit colour; under canopy bars are often red-rich or broad spectrum |
Spectrum chart and PPF by colour band |
|
Thermal design |
Heat shortens LED life and reduces output |
Housing material, heat sink design, operating temperature range |
|
Driver |
Affects efficiency, flicker, dimming and surge protection |
Driver specification, efficiency, power factor, dimming interface |
|
IP rating |
Greenhouses are humid and are washed or irrigated |
IP rating for the whole fixture, such as IP65 or higher |
|
Lifetime (L90 / L70) |
Decides how long before output has dropped too far |
LM-80 / TM-21 data and the hours claimed. [Insert your figure] |
|
Housing and lens materials |
Corrosion and UV resistance |
Aluminium grade, coating, polymer, any salt-spray test |
|
Light distribution |
Decides how evenly both rows are lit |
Beam angle and PPFD map at stated distances |
|
Cables and connectors |
Often the first weak point in a humid house |
Cable rating, connector type, daisy-chain limit |
Installation and Spacing Tips
The best fixture gives poor results if it is hung in the wrong place. These points come up often.
Keep a safe gap from the leaves. Fixtures that are too close can mark or stress leaves, especially with a hot driver. Many growers keep a gap of some tens of centimetres. [Insert the distance recommended for your product.]
Raise the bars as the plant grows. The light should reach the middle and lower leaves, so the height changes through the crop. Plan hanging hardware that is easy to adjust.
Offset from top lights. Avoid placing bars directly beneath top fixtures, where they add little and block overhead light.
Space along the row for even light. Gaps between bars leave dim patches, and overlap wastes power. Use the manufacturer's light map to set spacing.
Use dual side bars in interior aisles and single side bars at the edges. This avoids lighting a wall.
Plan wiring and drainage. Run cables out of the way of workers and water. Use drip loops and proper glands.
Common mistakes. Hanging bars too high, spacing them too far apart, ignoring leaf removal that changes the canopy shape, and installing without dimming control.
Industry Trends in Greenhouse Tomato Lighting
Energy cost. Electricity is a large part of the cost of lit tomato production. Growers look closely at efficacy, run time and tariff schedules to keep it down.
Hybrid lighting. Many greenhouses combine top lights with under canopy lights, and some mix LED with existing high-pressure sodium lamps while they move over to LED. The aim is to put light where the plant can use it.
Smart dimming. Controllers that follow outside light, work in zones, or follow a schedule built around tariff periods reduce energy use without lowering the light the crop receives.
Better light distribution. Newer bars are designed to give more even light along the length of the fixture and on both sides.
Safety and Compliance
Lighting in a greenhouse sits in a wet, humid place. Certification shows that a product has been tested to a recognised standard. Ask which certificates apply to the exact model and voltage you plan to buy.
Common certifications
|
Certification |
What it covers |
Typical market |
Why you may need it |
|
UL (such as UL 8800 for horticultural lighting) |
Electrical and fire safety |
United States, Canada |
Often expected by inspectors and insurers |
|
ETL |
Safety testing to North American standards |
United States, Canada |
Accepted in many cases in place of UL |
|
DLC (Horticultural Lighting) |
Efficacy and performance thresholds |
United States, Canada |
Often required for utility rebates |
|
CE |
EU safety, EMC and related directives |
European Union |
Required to sell and install in the EU |
|
RoHS |
Restricted substances in electrical products |
EU and other markets |
Market access and buyer requirements |
[List only the marks your products hold, with certificate numbers.] If you plan to apply for an energy incentive, read the programme's current rules first. Many schemes require a DLC listing or a minimum efficacy, and the rules change.
Choosing a Manufacturer
If you are looking for an under canopy grow light manufacturer, or wholesale under canopy grow lights for a volume or private-label project, these questions help you judge a supplier or LED grow light factory.
Factory capability. Does the factory run its own assembly, ageing and test lines? Does it make its own housings? [Add your production lines and monthly capacity.]
MOQ. Ask for the minimum order on standard and custom models.
OEM and ODM. Check whether length, power, spectrum, lens, cable, connector, housing colour and branding can be changed. [List your options.]
Samples. Ask for a sample you can test in a real row for several weeks, with a clear lead time and cost policy.
Test reports. Ask for photometric and electrical reports and LM-80 / TM-21 data that match the model you will receive.
Warranty. Ask for the term, scope and claim process in writing
FAQ
Q: If I already have top lights, do I still need under canopy lights?
A: Not always. Top lights light the upper canopy well, but the middle and lower leaves stay shaded as the plant grows. If your crop is tall and dense and the lower part of the plant is short of light, adding under canopy lights is one way to address it. A small trial section is a sensible way to check the benefit for your variety and site.
Q: What share of the lighting power should go to under canopy lights?
A: A common planning range is about 20–30% of total installed power, with the rest on top lights. Lower-density crops may use less, and dense high-wire crops more. Confirm with a PPFD map and your agronomist.
Q: How far should the lights be from the tomato plants?
A: It depends on the fixture, its heat output and the light level at the surface. Many growers keep a gap of some tens of centimetres and raise the bars as the plant grows. Follow the manufacturer's guidance for your product
Q: Can under canopy lights replace top lights?
A: In most cases, no. They are built to light the layer inside the canopy and are used with top lights or sunlight, not instead of them.
Q: Are dual side bars better than single side bars?
A: They suit interior aisles, where one bar can light two rows and reduce the number of fixtures. At the edge of a bay or against a wall, single side bars usually make more sense.
Q: How much does it cost to run under canopy lights?
A: Use the formula: watts ÷ 1,000 × hours × price per kWh. In the 2,000 sq ft example, 2,800 W of under canopy lighting run 10 hours a day at $0.12 per kWh costs about $3.36 per day.
Q: What should I send a supplier to get a quote?
A: Send the greenhouse area, crop and variety, plant height, row length and spacing, the type and power of your existing top lights, and the supply voltage. Add the target light level and whether you need dimming control.
Get a Quote and Samples
If you send us your greenhouse area, the type and power of your top lights, and your supply voltage, we can suggest an under canopy layout, a power level and a control approach, and quote it. Samples are available so you can test the bars in your own rows before a larger order